Mastering eyeshadow techniques enhances eye features‚ boosts confidence‚ and transforms your makeup look; This guide offers step-by-step tutorials‚ tips‚ and tricks for beginners and pros‚ ensuring flawless results.
Understanding the Basics of Eyeshadow
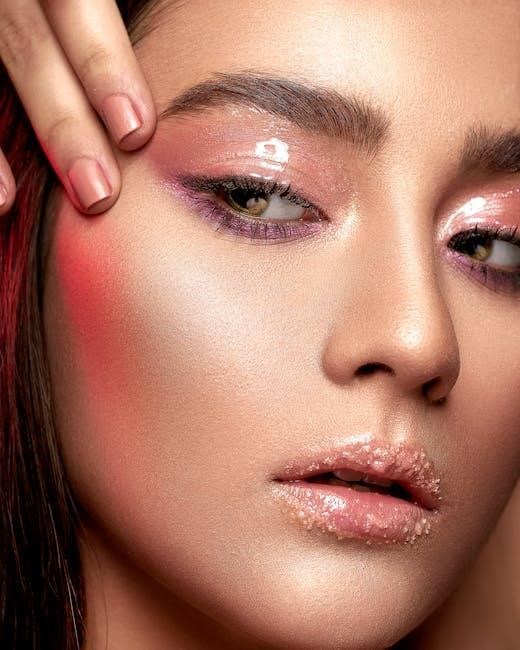
Eyeshadow is a versatile makeup product used to enhance and define the eyes‚ available in various finishes like matte‚ shimmer‚ and satin. It can be applied wet or dry‚ depending on desired intensity.
Learning basic techniques‚ such as where to place light‚ medium‚ and dark shades‚ creates depth and dimension. Start with a light base color across the lid‚ medium tones in the crease‚ and darker shades for liner or depth.
Blending is key to a seamless look‚ ensuring no harsh lines. Brushes or sponges are essential tools for application. Eyeshadow can transform eye shape and add personality to any makeup look.
Understanding these fundamentals helps build confidence and versatility in creating stunning eye makeup styles.
Importance of Eyeshadow in Makeup
Eyeshadow plays a crucial role in makeup by enhancing the shape and appearance of the eyes. It adds depth‚ dimension‚ and a pop of color that complements the overall look.
Whether creating a natural everyday look or a dramatic evening style‚ eyeshadow helps define the eyes and draws attention to this focal point. It can make eyes appear larger‚ smaller‚ or more balanced‚ depending on technique.
Eyeshadow also allows for self-expression‚ with countless shades and finishes to suit any mood or occasion. Proper application can elevate a simple makeup routine‚ making it essential for both casual and special events.

Preparation for Eyeshadow Application
Preparation is key for a flawless eyeshadow look. Start by priming lids to enhance color and longevity. Apply a base shade for even coverage and blend well. Choose the right brushes for precise application. Proper prep ensures smooth‚ professional results.
Primer and Base Application
Applying primer is the first step in any eyeshadow look‚ as it creates a smooth canvas and extends wear. Gently pat a small amount onto your lids with your ring finger or a brush. Allow it to set for a few seconds before moving on. Next‚ sweep a light base shade across the entire lid using a fluffy brush. This step ensures even color distribution and helps the eyeshadow adhere better. For a more vibrant look‚ you can also apply a transition shade lightly in the crease. Proper primer and base application are essential for a polished‚ long-lasting finish. This technique prevents creasing and enhances pigment payoff‚ making your eyeshadow pop all day long.
Choosing the Right Brushes
Selecting the right eyeshadow brushes is crucial for achieving a professional finish. A fluffy all-over brush is ideal for applying base shades across the lid‚ while a smaller‚ denser brush works best for the crease to build depth. For precise application‚ use a flat brush to pack on pigment or a pencil brush for detailing. Angle brushes are great for creating sharp lines or smudging. Natural fibers like sable or taklon are preferred for their ability to hold and blend eyeshadow effectively. Experiment with different brush sizes and shapes to find what works best for your eye shape and desired look. Proper brush selection ensures smooth‚ even coverage and makes blending easier. Invest in quality brushes to elevate your eyeshadow game and achieve flawless results every time.

Basic Eyeshadow Techniques
Mastering basic eyeshadow techniques involves applying shades smoothly‚ blending edges for a seamless look‚ and creating dimension with light and dark tones to enhance your natural eye shape.
Applying All Over the Lid
Applying eyeshadow all over the lid is a fundamental step in any makeup look. Start by priming your eyelids to ensure long-lasting coverage and vibrant color. Using a flat brush‚ sweep a light base shade across the entire lid‚ from the lash line to the crease. This creates a uniform base and enhances the natural shape of your eyes. For a more defined look‚ apply a medium-toned shade to the outer corner‚ blending gently inward. Avoid harsh lines by feathering the edges with a fluffy brush. This technique provides a smooth‚ even finish and serves as the perfect foundation for more complex styles. Remember to blend well for a seamless transition between colors.
Blending Colors Effectively
Blending eyeshadow colors seamlessly is key to achieving a professional makeup look. Start by applying lighter shades on the lid and gradually transition to darker tones in the crease. Use a fluffy blending brush to soften harsh lines‚ working in light‚ gentle strokes. Focus on the outer corner and crease‚ blending upward and outward for a natural gradient. Avoid over-blending‚ as this can erase your base color. Instead‚ blend just enough to create a smooth transition between shades. For a polished finish‚ sweep a light highlight under the brow bone and in the inner corner of the eye. Practice makes perfect—experiment with different techniques to master the art of blending for a flawless‚ professional result every time.
Essential Tools and Brushes
High-quality brushes and tools are vital for precise eyeshadow application. Invest in a variety of fluffy blending brushes‚ flat shaders‚ and crease brushes for optimal results. Proper care ensures longevity.
Types of Eyeshadow Brushes
Choosing the right eyeshadow brushes elevates your makeup game. A fluffy blending brush softens harsh lines and creates seamless transitions. Flat shader brushes are ideal for packing color onto the lid. Crease brushes‚ with their angled or tapered tips‚ are perfect for applying shadow in the eye crease. Smaller detail brushes allow for precision in the inner corner or under the brow. Angled brushes are great for lining the lash line or creating sharp edges. Each brush serves a specific purpose‚ ensuring a polished‚ professional finish. Investing in quality tools and maintaining them properly will enhance your eyeshadow application and longevity of the brushes.
Other Necessary Tools
Beyond brushes‚ several tools enhance your eyeshadow application. Makeup sponges are great for blending or touching up edges. Tweezers help place shadow precisely or clean up lashes. A lash curler opens the eye area‚ making application easier. A magnifying mirror provides clear visibility for detailed work. Optional tools include a spray bottle to wet brushes for intense pigmentation and a palette for organizing shadows. These accessories streamline your process‚ ensuring a polished look. Remember‚ quality tools and proper care are key to achieving professional results and maintaining your eyeshadow application.
Color Selection and Coordination
Selecting complementary colors creates harmony and enhances eye features. Cool tones suit deep eyes‚ while warm tones brighten lighter eyes. Proper coordination elevates any look‚ ensuring a balanced appearance. Use light shades to highlight and dark tones for depth‚ blending seamlessly for a natural finish; Experiment with palettes to find your perfect match‚ creating a personalized eyeshadow wardrobe. This step ensures your makeup is both stunning and cohesive‚ whether for everyday wear or special occasions. Remember‚ the right colors can transform your look‚ making your eyes truly stand out. Always consider your skin tone and personal style when choosing shades. This guide helps you master the art of color selection and coordination‚ making every application effortless and professional. By understanding how colors work together‚ you can create endless looks tailored to your preferences andneeds‚ ensuring you always look your best.
How to Choose Complementary Colors
Choosing complementary colors for eyeshadow involves understanding color theory and personal preferences. Cool tones like purples and blues complement green or hazel eyes‚ while warm shades such as golds and bronzes enhance brown eyes. Consider your skin tone—warm skin looks radiant with earthy shades‚ while cool skin pops with berry tones. Experiment with color palettes to find combinations that flatter your features. Lighter shades highlight the inner corners‚ medium tones define the lid‚ and darker hues add depth to the crease. Remember‚ complementary colors should harmonize to create a balanced look. Test different combinations to discover what works best for you‚ ensuring your eyeshadow enhances your natural beauty. This approach helps you create cohesive‚ professional looks tailored to your unique style and preferences.
Transition Shades and Highlights
Transition shades and highlights are essential for creating depth and dimension in your eyeshadow look. Transition shades‚ typically medium-toned neutrals‚ blend seamlessly between light and dark colors‚ softening harsh lines. Apply them to the crease or outer corner of the eye to create a smooth gradient. Highlights‚ often shimmery or light shades‚ are placed on the inner corner‚ brow bone‚ or center of the lid to brighten and enhance the eyes. Proper blending ensures a natural transition‚ while highlights add a radiant finish. Use light‚ sweeping motions to apply these shades‚ building coverage gradually for a polished effect. Balancing transition shades and highlights enhances the overall look‚ making your eyes stand out with professional finesse.
Application Based on Eye Shape
Customizing eyeshadow application to your eye shape enhances natural beauty. Techniques vary for hooded‚ deep-set‚ or wide eyes‚ ensuring balanced‚ contoured‚ and dimensional results that flatter your features.
Techniques for Hooded Eyes
For hooded eyes‚ focus on enhancing depth without overwhelming the lid. Apply light shades across the lid and inner corner to brighten. Use medium tones in the crease‚ blending upward to create the illusion of space. Darker shades should be placed at the outer corner to add dimension. Avoid heavy layers‚ as this can make the area appear smaller. Blend thoroughly to ensure a seamless transition. Highlight the brow bone with a subtle shimmer to lift the eye. Opt for smaller brushes for precision and control. This approach creates a balanced‚ defined look tailored to hooded eyes‚ ensuring the eyeshadow complements the natural structure without looking heavy or cluttered.
Deep-Set Eyes Application
For deep-set eyes‚ emphasize the crease to create depth. Apply medium to dark shades in the crease‚ starting from the outer corner and blending inward. Use a light‚ shimmery shade on the lid to brighten and make the eyes appear larger. Highlight the brow bone with a light‚ matte or shimmery shade to lift the area. Avoid heavy dark shades on the lid‚ as they can make the eyes appear smaller. Instead‚ focus on blending the crease color upward and outward to create dimension. Use a light hand when applying darker shades to maintain balance. Blend thoroughly to avoid harsh lines‚ ensuring a smooth transition between colors. This technique enhances the natural depth of deep-set eyes while keeping the look balanced and polished.
Different Eyeshadow Looks
Discover versatile eyeshadow looks‚ from natural everyday styles to dramatic smoky eyes and bold‚ vibrant creations. Learn techniques for various occasions and achieve stunning results effortlessly.
Natural Everyday Look
A natural everyday eyeshadow look is perfect for subtle‚ enhancing beauty without being overpowering. Start by applying a light base shade across your lid. Use a medium tone in the crease for depth‚ blending softly. Highlight the inner corner with a shimmery shade for brightness. Avoid dark or bold colors‚ opting for neutral tones like beige‚ taupe‚ or soft brown. Blend well to ensure a seamless transition. This look is ideal for daily wear‚ as it enhances your features naturally. For a quick application‚ focus on one or two shades and blend lightly. Pair with defined brows and mascara for a polished yet effortless appearance. This style suits all eye shapes and is versatile for work or casual outings.
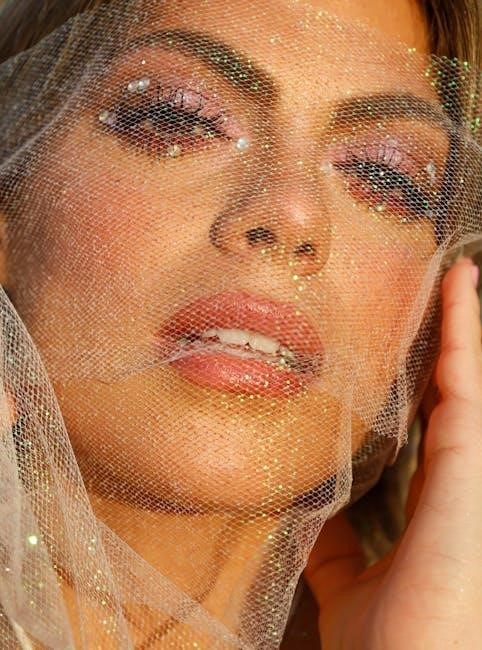
Smokey Eye Tutorial
A smoky eye is a classic‚ versatile look that adds drama to any makeup routine. Start by priming your lids for better color payoff. Apply a light base shade across the lid. Use a medium-toned shadow in the crease to create depth‚ blending softly. Darken the outer corner with a deep shade‚ ensuring smooth transitions. Line your upper lash line with eyeliner and smudge it slightly for a softer effect. Highlight the inner corner with a shimmery light shade to brighten the eyes. Finish by coating your lashes with mascara. This look works for both daytime and evening events‚ offering a sophisticated‚ sultry appearance. Blend thoroughly to avoid harsh lines‚ and layer colors gradually for a professional finish.
Advanced Eyeshadow Techniques
Explore expert methods like layering colors for depth and creating sharp cut creases. These techniques elevate your look‚ adding dimension and polish for a professional finish.
Layering Colors for Depth
Layering eyeshadows creates a multi-dimensional look by combining light and dark shades. Start with a base color across the lid‚ then add medium tones to the crease for depth. Darker shades can be applied to the outer corner to enhance structure. Blend thoroughly to ensure a seamless transition. Highlight the brow bone and inner corner with a light shade for brightness. This technique works for both natural and glam looks‚ making eyes appear more defined. Proper blending is key to avoid harsh lines. Practice layering to achieve professional results that complement your eye shape and color.
Creating a Cut Crease
A cut crease is a dramatic technique that involves sharp‚ defined lines to create contrast. Start by applying primer and a light base shade. Use a flat brush to pack a bold eyeshadow along the crease‚ creating a sharp edge. Blend slightly upward for softness. Highlight the lid with a contrasting shade for dimension. Line the lower lash line to enhance the look. This technique works best with liquid eyeliner for a precise finish. Proper blending and clean lines are essential for a polished appearance. Practice makes perfect‚ as it requires precision and control. This style is ideal for evening events or bold makeup looks.
Maintenance and Removal
Keep your eyeshadow looking fresh by setting with powder and touching up crease lines. Remove gently with micellar water to avoid skin irritation‚ ensuring a clean finish daily.
Touch-Up Tips
For a flawless finish‚ gently blot any excess oil with a tissue. Use a small brush to reapply eyeshadow on areas where color may fade‚ ensuring even coverage. Blend lightly with a fluffy brush to maintain seamless transitions. Avoid over-blending‚ as it can dull the pigments. To brighten the look‚ dab a light highlight shade under the brow bone and inner corner of the eye. Set the look with a setting spray to prevent creasing and extend wear. These quick touch-ups keep your eyeshadow vibrant and polished throughout the day‚ perfect for maintaining a professional or glamorous appearance effortlessly.
Proper Eyeshadow Removal
Removing eyeshadow correctly is crucial for skin health and preventing irritation. Start by soaking a cotton pad with a gentle makeup remover. Gently press the pad onto the eyelid‚ holding for a few seconds to dissolve the product. Wipe away the eyeshadow in smooth‚ downward strokes‚ avoiding harsh rubbing. For stubborn glitter or dark shades‚ use an oil-based remover to break down the pigments. Rinse with warm water and pat dry. Follow up with a hydrating cleanser to maintain the skin’s moisture balance; Proper removal ensures a clean canvas for the next makeup application‚ promoting healthy and radiant skin.